 |
A "board meeting"! |
Sunday, June 24, 2012
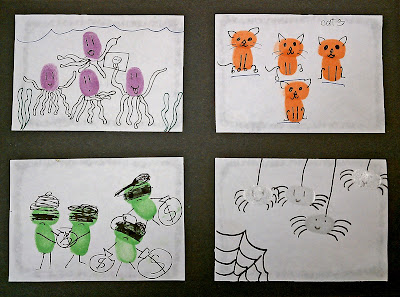
Finger Print Characters
Saturday, June 23, 2012
Botanical Illustrations
We took some time to learn about scientific flower illustrations in this lesson! I showed the class images of real botanical illustrations and discussed why they were made and what their use is. After talking about the illustrations, I had the kids sit down in front of many groups of different (and yes, real!) flowers. The students were to study the flowers and draw them with as much detail as they could. We didn't draw on regular paper but recycled news paper and book pages to evoke the antique feel of an old botanical illustration. The students drew the flowers in black crayon and drew a pattern in the background using a white crayon to begin the wax resist technique. Then the students painted in their flower pictures with watercolor paints. I had my older students do a bigger image on a piece of newspaper and my younger students made a group of 4 five in squares on the book pages. We then decoupaged them onto construction paper with Modge Podge!
Thursday, June 21, 2012
Wayne Thiebaud Sweet Treat Art!
We learned about the artist Wayne Thiebaud and how he uses cakes, pies, ice cream cones and any other sweet treat as his subject matter. We looked at his art and then brainstormed together all of the desserts we could think of and wrote them on the board. The students were then given a note card to make their contour drawing of the treat of their choice. The card was used as a tracer for the kids to make multiple images that were all the same size. We first tinted our paper using a big glob of white paint and a dot of either red, yellow, or blue as our tint color. When the paper was dry the students traced their treat tracer in pencil and then colored them and added shadows using oil pastels. Yummy!
 |
| These are "truffles" done by a kindergartner...loooove it! |
If I Built A Car!
In this lesson I read the book "If I Built a Car" by Chris Van Dusen to the kids. This book is about a little boy who tells a story about what a car would look like if he could build it. The students put their creativity to use and designed their own futuristic car! The students drew their futuristic car design on a color of their choice. They then painted their windows with white and outlined their pencil lines with black paint. They cut the car out and glued it onto their funky background made from printed bubble wrap! Vroooooom!
Westside Summer School 2012
Summer school 2012 is underway and we have been very busy with a lot of exciting projects! We started off with a simple printmaking project done by stamping a chopped up pool noodle :) The kids used tempera paint to stamp their circles and then used oil pastels to create a unique art piece! We talked about the use of different patterns and repetition they could add to their print.
Subscribe to:
Comments (Atom)


.jpg)